As you are reaching here you might be knowing that with the release of Ionic 6, the datetime picker component (ion-datetime) has been completely revamped.
It is now showed as inline rather in an overlay which it used to, in its previous versions like Ionic 5 or Ionic 4 or later. This change is being appreciated due to flexibility, modern styling and developer friendly features.
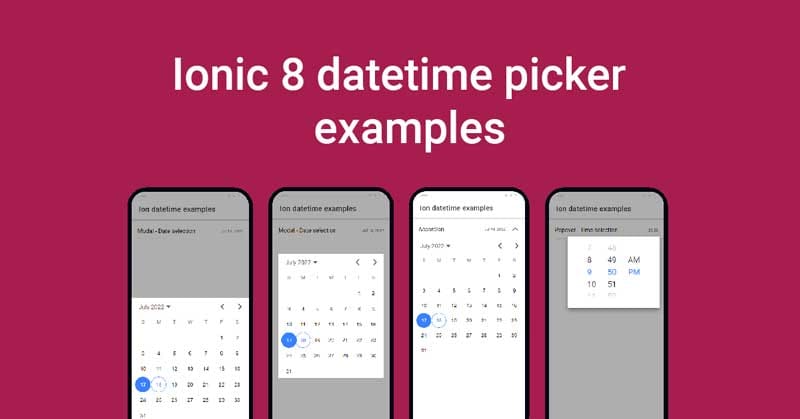
However some of you might be wondering how to use this new inline ionic 6 date picker component. Don’t worry as we will be sharing different ways you can implement and use this new component as per your use case in your angular project.
1. Datepicker in accordion [ion-accordion]

<ion-list>
  <ion-accordion-group>
    <ion-accordion value="start">
      <ion-item slot="header">
        <ion-label>Accordion</ion-label>
        <ion-note slot="end">{{dateExample | date}}</ion-note>
      </ion-item>
      <ion-datetime
        slot="content"
        displayFormat="MMMM YY"
        [(ngModel)]="dateExample"
        size="cover"
        presentation="date"
      ></ion-datetime>
    </ion-accordion>
  </ion-accordion-group>
</ion-list>
import { Component } from '@angular/core';
@Component({
selector: 'app-root',
templateUrl: 'app.component.html',
styleUrls: ['app.component.scss'],
})
export class AppComponent {
dateExample = new Date().toISOString();
constructor() {}
}2. Datepicker in modal overlay [ion-modal] – centered

<ion-list>
<ion-item id="open-modal">
<ion-label>Modal - Date selection</ion-label>
<ion-note slot="end">{{dateExample | date}}</ion-note>
</ion-item>
<ion-modal trigger="open-modal" [cssClass]="'center'">
<ng-template>
<ion-datetime
presentation="date"
[(ngModel)]="dateExample"
size="cover"
></ion-datetime>
</ng-template>
</ion-modal>
</ion-list>import { Component } from '@angular/core';
@Component({
selector: 'app-root',
templateUrl: 'app.component.html',
styleUrls: ['app.component.scss'],
})
export class AppComponent {
dateExample = new Date().toISOString();
constructor() {}
}ion-modal {
&.center {
--width: calc(100% - 2em);
align-items: center;
--height: auto;
.ion-page {
position: relative;
display: block;
contain: content;
}
}
}3. Datepicker in modal overlay [ion-modal] – bottom

<ion-list>
<ion-item id="open-modal2">
<ion-label>Modal - Date selection</ion-label>
<ion-note slot="end">{{dateExample | date}}</ion-note>
</ion-item>
<ion-modal trigger="open-modal2" [cssClass]="'bottom-end'">
<ng-template>
<ion-datetime
presentation="date"
[(ngModel)]="dateExample"
size="cover"
[showDefaultButtons]="true"
></ion-datetime>
</ng-template> </ion-modal
></ion-list>
import { Component } from '@angular/core';

@Component({
  selector: 'app-root',
  templateUrl: 'app.component.html',
  styleUrls: ['app.component.scss'],
})
export class AppComponent {
  dateExample = new Date().toISOString();
  constructor() {}
}ion-modal {
&.bottom-end {
align-items: flex-end;
--height: auto;
.ion-page {
position: relative;
display: block;
contain: content;
}
}
}
4. Timepicker in modal overlay [ion-modal] – bottom
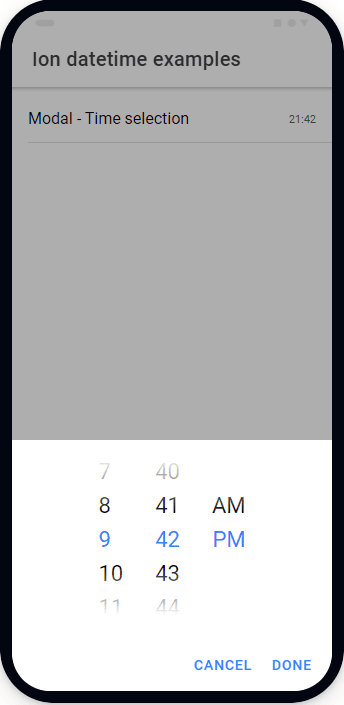
<ion-list>
<ion-item id="open-modal3">
<ion-label>Modal - Time selection</ion-label>
<ion-note slot="end">{{dateExample | date: 'HH:mm'}}</ion-note>
</ion-item>
<ion-modal trigger="open-modal3" [cssClass]="'bottom-end'">
<ng-template>
<ion-datetime
presentation="time"
[(ngModel)]="dateExample"
size="cover"
[showDefaultButtons]="true"
></ion-datetime>
</ng-template>
</ion-modal>
</ion-list>
import { Component } from '@angular/core';

@Component({
  selector: 'app-root',
  templateUrl: 'app.component.html',
  styleUrls: ['app.component.scss'],
})
export class AppComponent {
  dateExample = new Date().toISOString();
  constructor() {}
}
ion-modal {
&.bottom-end {
align-items: flex-end;
--height: auto;
.ion-page {
position: relative;
display: block;
contain: content;
}
}
}
5. Datepicker in popover [ion-popover]
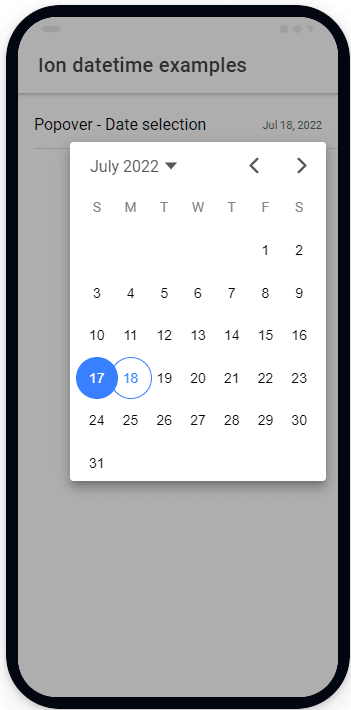
<ion-list>
<ion-item>
<ion-label>Popover - Date selection</ion-label>
<ion-note slot="end" id="open-popover1">{{dateExample | date}}</ion-note>
</ion-item>
<ion-popover trigger="open-popover1" cssClass="width-80">
<ng-template>
<ion-datetime
presentation="date"
[(ngModel)]="dateExample"
size="cover"
></ion-datetime>
</ng-template>
</ion-popover>
</ion-list>
import { Component } from '@angular/core';

@Component({
  selector: 'app-root',
  templateUrl: 'app.component.html',
  styleUrls: ['app.component.scss'],
})
export class AppComponent {
  dateExample = new Date().toISOString();
  constructor() {}
}ion-popover {
&.width-80 {
--width: 80%;
}
}6. Timepicker in popover [ion-popover]
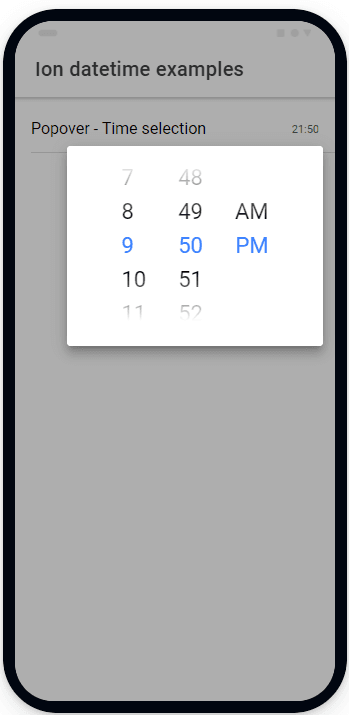
<ion-list>
  <ion-item>
    <ion-label>Popover - Time selection</ion-label>
    <ion-note slot="end" id="open-popover2"
      >{{dateExample | date: 'HH:mm'}}</ion-note
    >
  </ion-item>
  <ion-popover trigger="open-popover2" cssClass="width-80">
    <ng-template>
      <ion-datetime
        presentation="time"
        [(ngModel)]="dateExample"
        size="cover"
      ></ion-datetime>
    </ng-template>
  </ion-popover>
</ion-list>
import { Component } from '@angular/core';
@Component({
selector: 'app-root',
templateUrl: 'app.component.html',
styleUrls: ['app.component.scss'],
})
export class AppComponent {
dateExample = new Date().toISOString();
constructor() {}
}ion-popover {
&.width-80 {
--width: 80%;
}
}Conclusion
The versatility of this component is amazing and has so many use cases. We tried to cover all possible ways around where you can use this component. You can extend the examples above by changing the presentation property as per your use cases. We have listed all possible presentation inputs you can have :
- date
- date-time
- month
- month-year
- time
- time-date
- year
Your posts are really helpful. Please write some more posts for ionic. That would be really helpful for the community.
Sure Vineet, thanks for the motivating comment
I got this error
[error] – ERROR {“code”:1352}
when I click to open modal
Which Ionic version are you using ?