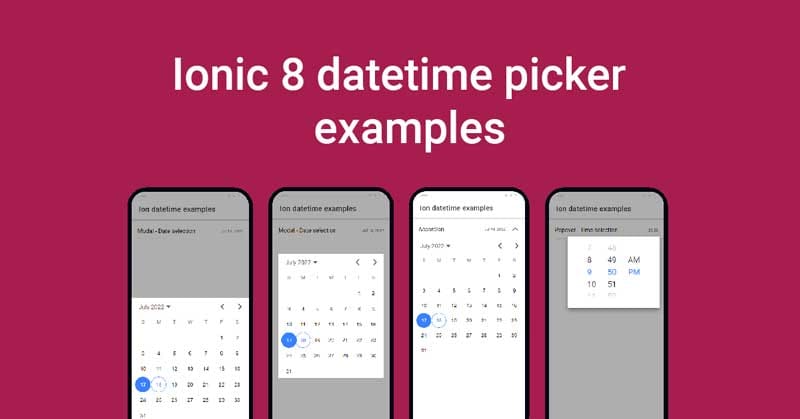
Ionic 8 has already been released and there have been many improvements so far, be it the new picker component or the built in new color palettes. Not limited to this, but overall theme experience and accessibility has also been improved.
The usage of the ionic 8 datetime picker component is almost similar to what we have shared in our last post.
1. Datepicker in accordion [ion-accordion]
<ion-list>
  <ion-accordion-group>
    <ion-accordion value="start">
      <ion-item slot="header">
        <ion-label>Accordion</ion-label>
        <ion-note slot="end">{{dateExample | date}}</ion-note>
      </ion-item>
      <ion-datetime
        slot="content"
        displayFormat="MMMM YY"
        [(ngModel)]="dateExample"
        size="cover"
        presentation="date"
      ></ion-datetime>
    </ion-accordion>
  </ion-accordion-group>
</ion-list>
import { Component } from '@angular/core';
@Component({
selector: 'app-root',
templateUrl: 'app.component.html',
styleUrls: ['app.component.scss'],
})
export class AppComponent {
dateExample = new Date().toISOString();
constructor() {}
} 2. Datepicker in modal overlay [ion-modal] – centered
<ion-list>
<ion-item id="open-modal">
<ion-label>Modal - Date selection</ion-label>
<ion-note slot="end">{{dateExample | date}}</ion-note>
</ion-item>
<ion-modal trigger="open-modal" [cssClass]="'center'">
<ng-template>
<ion-datetime
presentation="date"
[(ngModel)]="dateExample"
size="cover"
></ion-datetime>
</ng-template>
</ion-modal>
</ion-list> import { Component } from '@angular/core';
@Component({
selector: 'app-root',
templateUrl: 'app.component.html',
styleUrls: ['app.component.scss'],
})
export class AppComponent {
dateExample = new Date().toISOString();
constructor() {}
} ion-modal {
&.center {
--width: calc(100% - 2em);
align-items: center;
--height: auto;
.ion-page {
position: relative;
display: block;
contain: content;
}
}
} 3. Datepicker in modal overlay [ion-modal] – bottom
<ion-list>
<ion-item id="open-modal2">
<ion-label>Modal - Date selection</ion-label>
<ion-note slot="end">{{dateExample | date}}</ion-note>
</ion-item>
<ion-modal trigger="open-modal2" [cssClass]="'bottom-end'">
<ng-template>
<ion-datetime
presentation="date"
[(ngModel)]="dateExample"
size="cover"
[showDefaultButtons]="true"
></ion-datetime>
</ng-template> </ion-modal
></ion-list>
import { Component } from '@angular/core';

@Component({
  selector: 'app-root',
  templateUrl: 'app.component.html',
  styleUrls: ['app.component.scss'],
})
export class AppComponent {
  dateExample = new Date().toISOString();
  constructor() {}
} ion-modal {
&.bottom-end {
align-items: flex-end;
--height: auto;
.ion-page {
position: relative;
display: block;
contain: content;
}
}
}
4. Timepicker in modal overlay [ion-modal] – bottom
<ion-list>
<ion-item id="open-modal3">
<ion-label>Modal - Time selection</ion-label>
<ion-note slot="end">{{dateExample | date: 'HH:mm'}}</ion-note>
</ion-item>
<ion-modal trigger="open-modal3" [cssClass]="'bottom-end'">
<ng-template>
<ion-datetime
presentation="time"
[(ngModel)]="dateExample"
size="cover"
[showDefaultButtons]="true"
></ion-datetime>
</ng-template>
</ion-modal>
</ion-list>
import { Component } from '@angular/core';

@Component({
  selector: 'app-root',
  templateUrl: 'app.component.html',
  styleUrls: ['app.component.scss'],
})
export class AppComponent {
  dateExample = new Date().toISOString();
  constructor() {}
}
ion-modal {
&.bottom-end {
align-items: flex-end;
--height: auto;
.ion-page {
position: relative;
display: block;
contain: content;
}
}
}
5. Datepicker in popover [ion-popover]
<ion-list>
<ion-item>
<ion-label>Popover - Date selection</ion-label>
<ion-note slot="end" id="open-popover1">{{dateExample | date}}</ion-note>
</ion-item>
<ion-popover trigger="open-popover1" cssClass="width-80">
<ng-template>
<ion-datetime
presentation="date"
[(ngModel)]="dateExample"
size="cover"
></ion-datetime>
</ng-template>
</ion-popover>
</ion-list>
import { Component } from '@angular/core';

@Component({
  selector: 'app-root',
  templateUrl: 'app.component.html',
  styleUrls: ['app.component.scss'],
})
export class AppComponent {
  dateExample = new Date().toISOString();
  constructor() {}
} ion-popover {
&.width-80 {
--width: 80%;
}
} 6. Timepicker in popover [ion-popover]
<ion-list>
  <ion-item>
    <ion-label>Popover - Time selection</ion-label>
    <ion-note slot="end" id="open-popover2"
      >{{dateExample | date: 'HH:mm'}}</ion-note
    >
  </ion-item>
  <ion-popover trigger="open-popover2" cssClass="width-80">
    <ng-template>
      <ion-datetime
        presentation="time"
        [(ngModel)]="dateExample"
        size="cover"
      ></ion-datetime>
    </ng-template>
  </ion-popover>
</ion-list>
import { Component } from '@angular/core';
@Component({
selector: 'app-root',
templateUrl: 'app.component.html',
styleUrls: ['app.component.scss'],
})
export class AppComponent {
dateExample = new Date().toISOString();
constructor() {}
} ion-popover {
&.width-80 {
--width: 80%;
}
} Conclusion
The versatility of this component is amazing and has so many use cases. We tried to cover all possible ways around where you can use this component. You can extend the examples above by changing the presentation property as per your use cases. We have listed all possible presentation inputs you can have :
- date
- date-time
- month
- month-year
- time
- time-date
- year
